i’ll make this easy for you. when i’m gone and dead, and you’re all gathered together trying to think of the absolute, 100%, unequivocal winner of the title of The Coolest Thing Shannon Ever Made to engrave in tribute on my headstone…this is it. winner winner chicken dinner.
let me be clear: i’m not overstating this. and once you’ve seen it you’re bound to agree. ready?
waaiiiittt
for
it……..
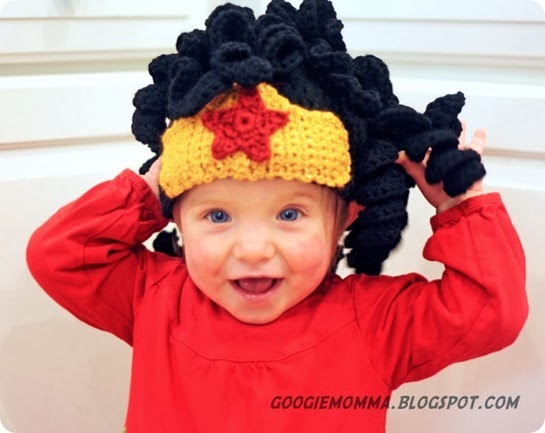
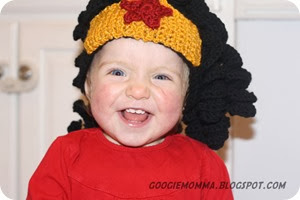
SHUT. UP. is that a crochet baby hat that looks like a shtinkin’ WONDER WOMAN WIG????
why yes. yes it is.
ARE WE EXCITED ABOUT THIS???
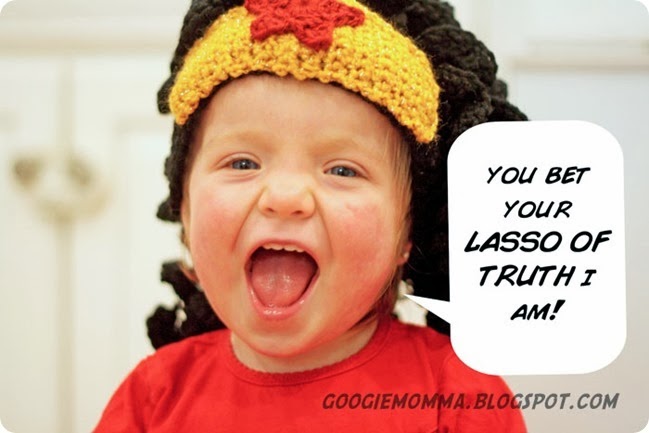
and i’ve even created this mind blowing photo for your pinning pleasure. ready?
BOOM.
i just won 1,000,000 internetz.
okay here’s the breakdown:
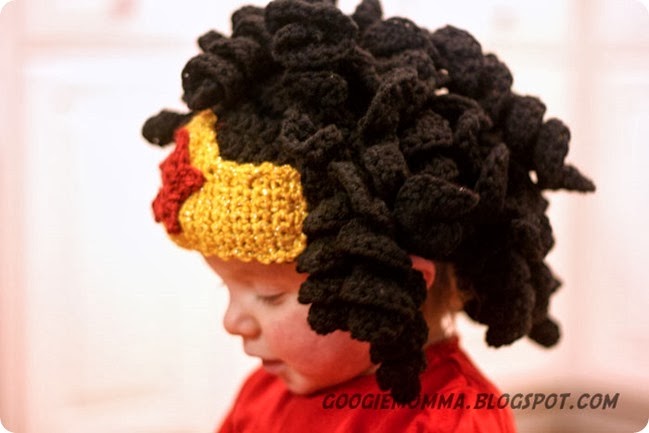
+ this is super easy—like beginner crochet. it’s a basic crochet cap. the spiral “curls”, the “crown” and star are separate pieces, sewn on to the cap.
+ i made this for a little baby. littler than elliot, and that’s why little ms. peyton here is my model. (the same baby who received the star wars quilt and onesie)
+ did i also make a pair of crochet GOLDEN BRACELETS with a red rattle/star on them? which i forgot to photograph? YUP.
+ i based the idea for this off this crochet princess hat, which is a free ravelry pattern. hmmm…what other wigs can we crochet???
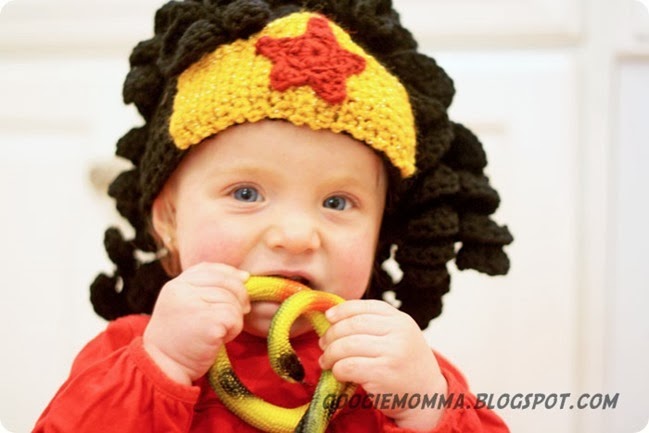
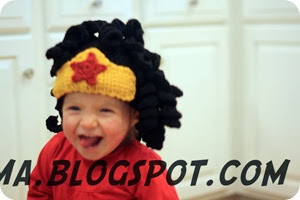
+ the hat isn’t heavy—peyton had no problem keeping it on her head. and actually quite loved it. in fact, she was having so much fun wearing it most of my photos look like this….
+ i’m sharing this pattern with you for free. FREEEEEE??? yes, free, with these small caveats: please link back to me and my blog if you make/share/blog this. and if you want to sell thousands in Ye Olde Etsy Shoppe, go forth and prosper. but PLEASE LINK BACK TO ME AND GIVE ME CREDIT FOR THE PATTERN. (and if you wanna cut me a commission i wouldn’t hate that if ya know what i’m sayin’)mmmkaythanksiloveyou.
Wonder Woman Crochet Hat
There are 4 major components to this hat (hat, curls, crown, star), which are crocheted individually and then sewn together at the end. I knot everything because I wanted this hat to be durable and potentially washable. I’ve had too many things slip apart eventually and then I get HULK SMASH ALL THE THINGS ANGRY.
These instructions are based on a 3-6 month old sized hat, but it can be easily sized up by making your beanie portion larger and a few more curls.
HAT
YARN: Black sport or worsted weight.
HOOK: H
+ + + + + + +
CH 3
Slip stitch into 1st CH to join, CH 1 (making a loop, or you can also start with a magic circle if you know how)
Round 1: CH 1, 9 HDC in ring, join with SL ST (9)
2: CH 1, 2HDC in each HDC around, join with SL ST (18)
3: CH 1, HDC in next HDC, 2 HDC in remainder of HDC, join with SL ST (27)
4: CH 1, *HDC in next 2 HDC, 2 HDC in next HDC, repeat from * all the way around. join with SL ST (36)
5: CH 1, *HDC in next 3 HDC, 2 HDC in next HDC, repeat from * all the way around. join with sl st (45)
6: CH 1, *HDC in next 4 HDC, 2 HDC in next HDC, repeat from * all the way around. join with sl st (54)
7-18: CH 1, HDC in each HDC, join with SL ST (54)
Fasten off, weave in ends.
this will make a size 6-12 month hat. if you’d like to size up or down, here is a good free pattern showing various sizes, or if you’re on ravelry you can see a few HERE
CURLS
YARN: same as hat
HOOK: G
NOTE: the curls are all made the same basic way: a long chain, then 2 or 3 treble/triple crochets in each chain. each is tied to the hat with a small piece of black yarn in roughly the center of the curl. i varied the lengths of the curls by chaining a different amount at the start, and did a 2-2-3 combo of TC back across. there’s not really a reason, just that the more stitches you put in each chain stitch the tighter the curl becomes. i thought 2 was a little loose and 3 was a little tight, so i did a combo, but you can do whatever works for you. (this is straight up mindless crocheting, perfect for TV watching ;)
note: if you’re making a larger size hat you’re probably going to need more curls to adequately cover the hat. just make a few extra.
+ + + + + + +
CH whatever length you need.
going back along the CH, do (2 TC, 2 TC, 3TC) repeat until you have 2 chains left
1 SC and a SL ST to finish off.
knot ends
repeat over and over until you have a sufficient amount of curls to cover the hat. some longer for the back (chain 45-55ish) and some shorter for the front (chain 25-30ish)
CROWN
YARN: Gold/yellow sport weight
HOOK: F
+ + + + + + +
CH 8
ROW 1: SC in 2nd CH, SC, CH 2 (7)
ROWS 2-9: SC, CH 2 and turn (7)
ROW 2: SC across, ch 2 and turn (31)
ROW 3 + 4: repeat ROW 2 (31)
ROW 5: SC 7 times, ch 2 and turn
ROW 6-8: repeat ROW 5
ROW 9: 3 SC in last ST, ch 2 and turn
ROW 10: 9 SC, CH 2 and turn
ROW 11: 8 SC, 3 SC in last st, ch 2 and turn
ROW 12: 11 SC, ch 2 and turn
ROW 13: 10 SC, 3 SC in last st, CHAIN 3 and turn
ROW 14: 13 SC (extra chain at the tip), chain 2 and turn
ROW 15: 9 SC, SC2TG 2 times (single crochet 2 together)
ROW 16: 11 SC
ROW 17: 7 SC, SC2TG 2 times
ROW 18: 9 SC
ROW 19: 5 SC, SC2TG 2 times
ROW 20: 7 SC
ROW 21-28: repeat ROW 20
finish by slip stitching across top of crown
STAR
Yarn: small piece of red
Hook: F
+ + + + + + +
chain 3
slip st into 1st chain and chain 1 (making a loop, you can also start with a magic circle if you know how)
15 SC into center
slip st into 1st SC to join and CH 4
*SC into 2nd chain from Hook, HDC (half double crochet) into next CH st, TC (treble crochet) into next CH st and slip stitch in 3rd chain of your round to join.
Repeat from * four more times to make 5 points of your star, join and tie off at the end.
PUT IT ALL TOGETHER
sew the star to the center of the crown, then sew the crown to the front of the hat, lining up the straight edge of the crown with the straight edge of the hat.
holding your curls roughly in the center, tie them in various places around the hat with a small section of black yarn. it helps if you put the hat on something to see where the curls will naturally fall (a doll, a convenient child, your knee…). this will also give you a sense of how many curls you need and how long they should be. make sure and do one or two shorter ones in the front, and layer them down the back for that fluffy, just-fresh-from-the-superhero-salon look.
place on your favorite toddler/baby and enjoy.


O.M.G.!!!! If I have a girl, my grandma is going to HAVE to make his for me!!
ReplyDeleteHoly COW that is awesome!! I want to make one for myself!! :)
ReplyDelete