
okay, really i didn’t do it because laura asked me. i only did it for peyton. who can say no to this face?

please paint me a tree, aunt shannon, please???
not me, that’s for sure ;)
so i used a combination of wall paint samples and acrylic craft paint to turn this:
into this:

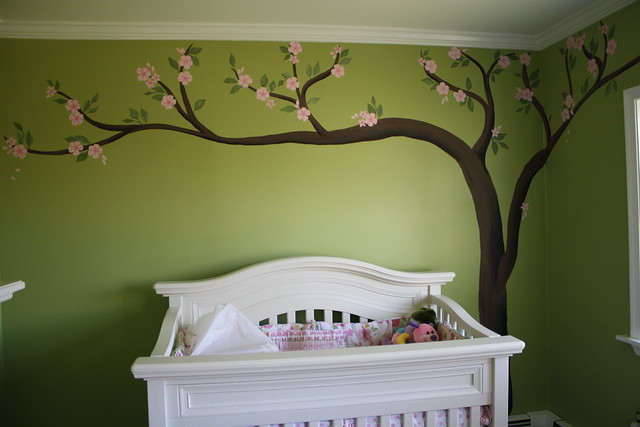
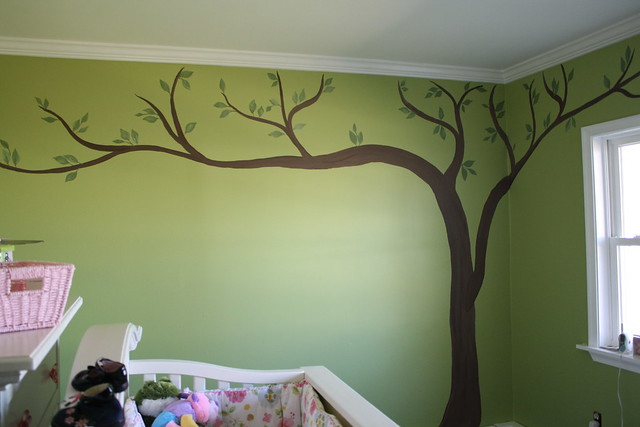
compared to the pottery barn original vinyl tree which retails for $174, ours cost about $10. (and i pretty much love ours waaaay more)
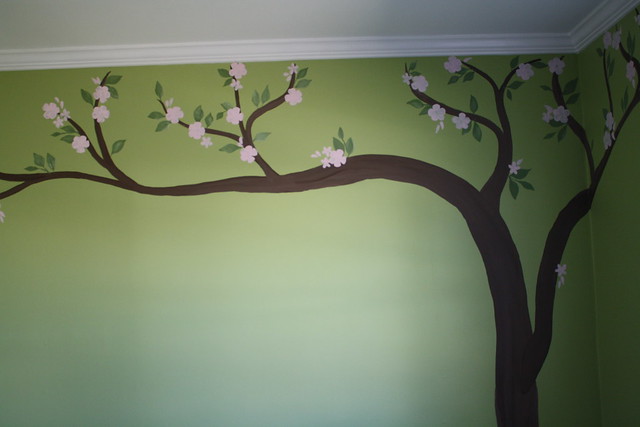
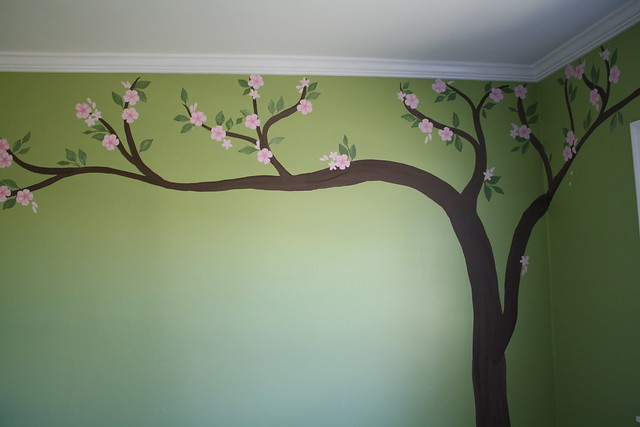
so let’s back up a bit and i’ll show you how i went about creating this cherry tree.
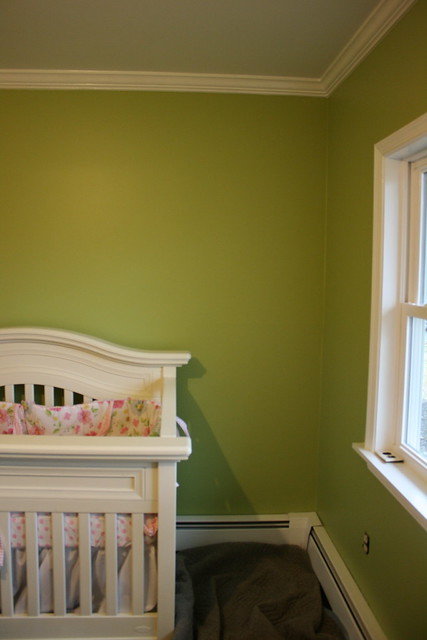
the room is painted a really pretty green color. a color i can not seem to get to look right when i edit these photos.

gigi wanted in this crib sooo bad
it was big bare wall, home to the crib and flanked by windows on one side.
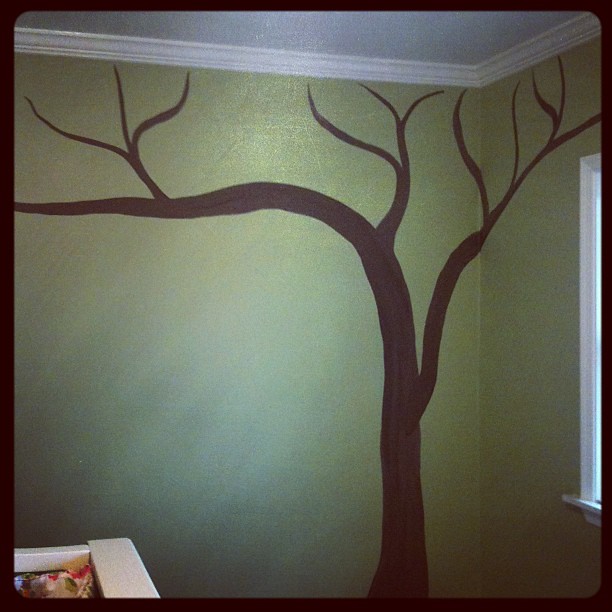
i began by simply sketching out the basic trunk and branch shape with a pencil, right on the wall. i had a printout of the pottery barn tree by my side for reference, and just jumped right in. i’m not big on planning, as you know. even when it’s someone else’s walls that are taking the hit.
side note: it was at about this point that my camera battery died. and i had neglected to bring my charger. so this post is going to be a combo of cell phone pictures and camera pictures. and my new computer does not yet have a good photo editor, so the camera pictures are kind of dull. basically--lots of stinky photos headed your way. sorry. moving on...i used two brown colors, squirted onto a paper plate side-by-side and NOT MIXED UP.
the key is using a nice wide brush with a very sharp edge so you can load your brush up with a substantial amount of paint and make nice clean lines.
fill in your pencil lines, creating the trunk and branches of the tree.
a lovely cell phone picture of this step for you:
oooohhh...spoooky
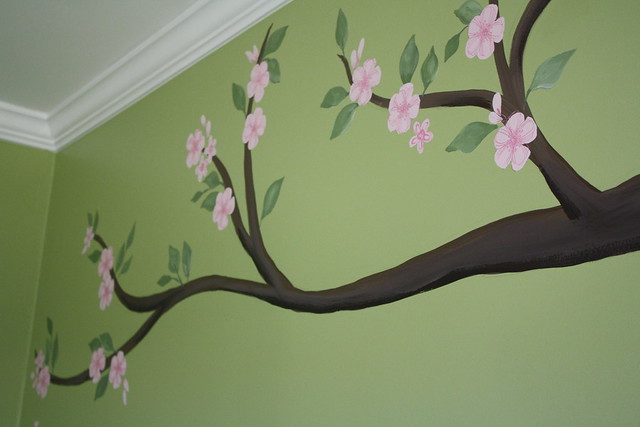
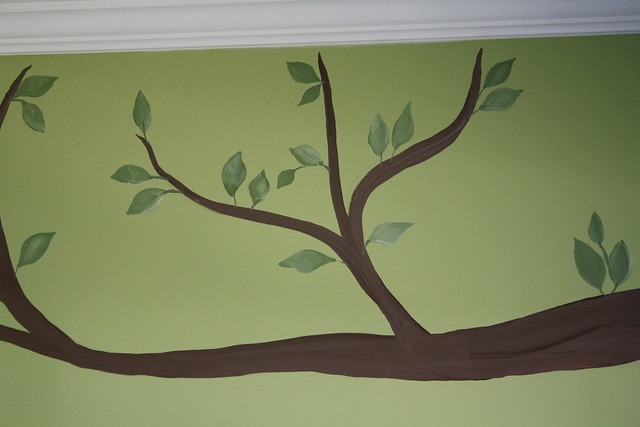
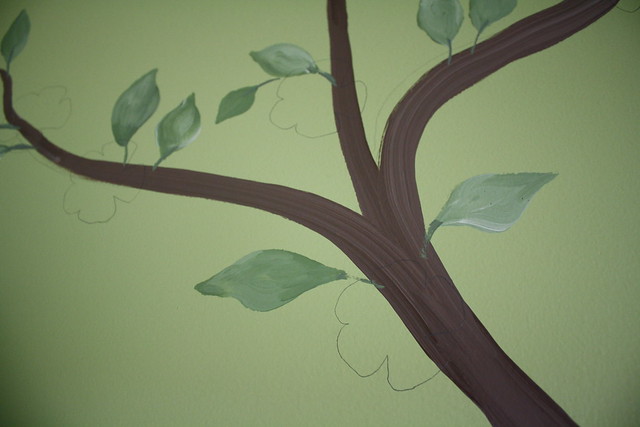
next i did the unmixed paint thing again—but with a couple of green shades and a touch of white. using my reference photos as, well, reference, i painted in some leaves. they seemed to be mainly on the top side of the branches and concentrated towards the outer edges.
use a small paintbrush to pull stems from the tip of the leaf down to the trunk after the leaves have dried, using a darker green color.
the flowers presented a bit of a challenge. and here’s where i admit something i didn’t bother mentioning to laura when i started this little project: i CAN NOT paint flowers. not roses, not hibiscus, not iris, no forget-me-nots, no peruvian lilies, no hydrangeas or petunias or even cherry blossoms.
believe me, i’ve tried. they end up looking like pink mush. it’s sad, really. not even donna dewberry could help me.
but it’s okay—because the solution makes this project fool proof and easy for anyone to do! it just requires this:
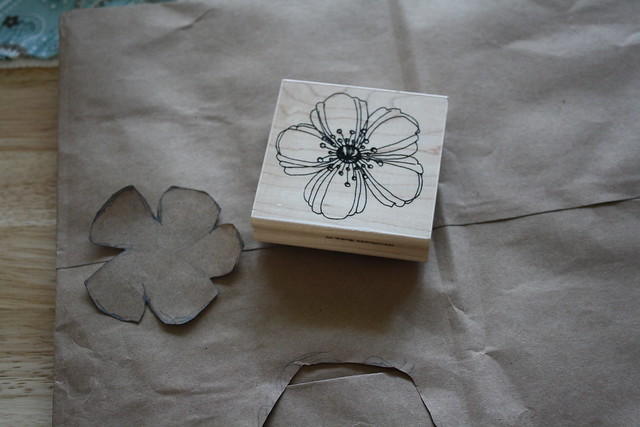
this stamp was purchased at michaels for about $6. i traced the stamp part and cut it out of some paper. then i used that as a stencil to draw flowers all over the tree.
next up: filling in the flowers with a not-mixed blend of two pinks. also up: forgetting a picture of this step entirely. (oops)
i also free hand painted in a couple of smaller sized flowers and some little buds--just a tiny leaf shape again--for a bit of variety.
after the flowers are completely, totally, 100% dry, take your original stamp and some dark pink paint. i put a thin, thin layer of the pink on a plate. you want only enough to coat the details on the stamp—too much and you’ll have pink mush (which obvs i don’t need a stamp for. i have those skills on my own). go back over all your flowers with the stamp. i only did 2 impressions to each paint refill on the stamp—i wanted them nice and bold. and while i did somewhat try and line up the stamp in the same direction as the painted flowers, i didn’t sweat it too much. the almost pen and ink type of look it gave the final product was awesome.
before:
after:
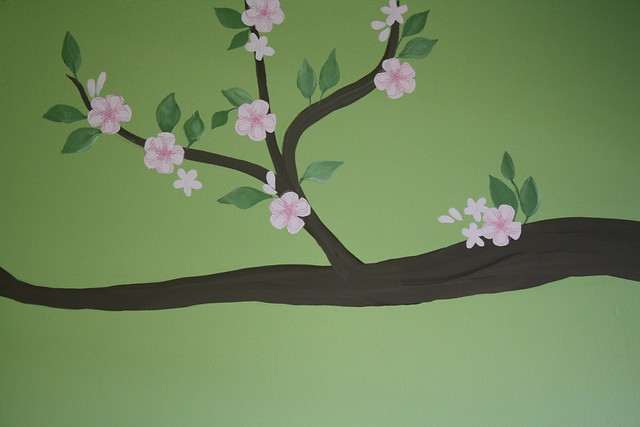
(i simply used a fine brush to freehand in some swirls with the dark pink paint on the smaller flowers and buds.)
finally, i took some black and the darkest brown i had and, using an almost dry brush, filled in some shadows and dark areas—mainly the underside of the branches and around the “fork” at the base.
it's a very subtle change, but the dark shadows really help the tree "pop" off the wall and look 3-dimensional.
before:
after:
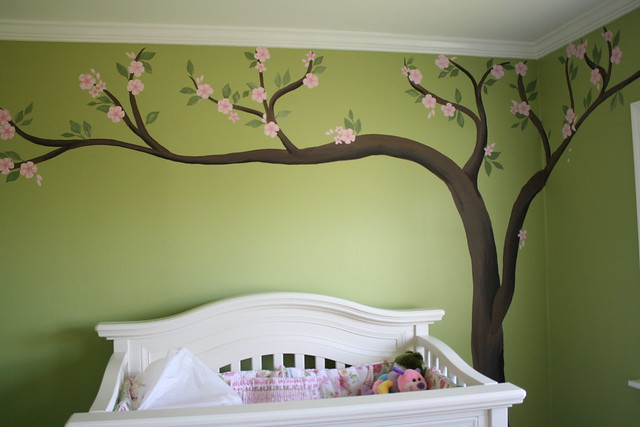
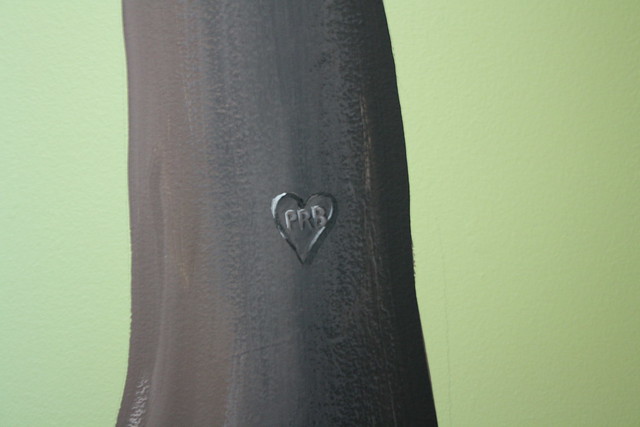
and as one last final touch i painted in peyton’s initials on the trunk. ;)
any random lingering pencil marks can be removed with the LIGHT use of a magic eraser. (i stinkin' love those things, amirite?)
mommy finished peyton’s room completely by adding her name in wooden letters hanging from the trunk over the crib. and a little butterfly.


a room fit for a princess. ;) enjoy miss p!

it's perfect. just beautiful!
ReplyDeleteWow.... this is so incredibly amazing!!!
ReplyDeleteSo pretty! You could buy a lot of paint for $174! Peyton is beautiful! How is she doing?
ReplyDeleteWow, that is spectacular!
ReplyDeleteThat is so beautiful, I'm in awe!
ReplyDeleteWell, great. Now I want to run out and buy a bunch of stamps and stamp all of my rooms. Thanks a lot.
ReplyDelete(but it's genius, really. Very pretty)
oh my goodness. This is beauitful! I love your replication of this much more than pottery barns!
ReplyDeleteThat is so cute! I wish I could paint like that. It looks great!
ReplyDelete~em at small girl, big world
We can't thank you enough Aunt Shannon for an awesome room! Peyton loves it. Every time we show her the tree she just stares and stares. Now that could be because she is only 3 months but i think it's because she knows it's beautiful and just for her! Thanks for decorating her room.....COULD NOT have done it without you and Jer!
ReplyDeletethanks gals! appreciate all the kind words :)
ReplyDeleteI put this on pinterest the other day and hundreds of people repinned it! Its such a good tutorial, makes big wall murals seem achievable. Though, Im sure you have a much steadier hand than I do to get your lines so nice and smooth!
ReplyDeleteThat is sooo cute!
ReplyDeleteVery nice! This has indeed become a room fit for a princess. I’m sure Peyton loved the mural you created just for her. You have come up with the best design for the whole room, my friend. The tree with pink flowers and a butterfly looks like the ones we often see in fairy tales. And, I believe your design can probably become one of your niece’s main reasons to smile every day.
ReplyDeleteClinton Hurlburt
Can you tell me what the green paint color on the wall is?
ReplyDeletehmmm...not sure. but I can tell you that the color it appears in these pics is very different from how it looks in real life. so I don't think the actual name would help very much! sorry! i'm thinking...avocado something?
DeleteI love this! Can you recommend a color for the flowers if the backdrop is light pink (instead of the green that your example had)?
ReplyDeletehmmmm...really it depends on the look you want. what accent colors are being used elsewhere in the room? my first thought was white flowers, with dark pink or black stamping. but a darker pink flower or even a yellow flower would be cute!
Delete